How To Transfer Embroidery Patterns
4 Easy Methods To Mark Your Fabric
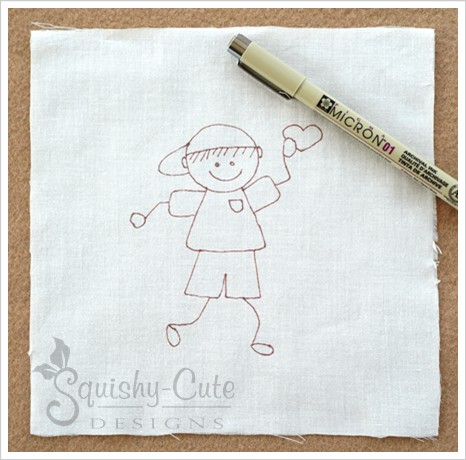
Do you want to know how to transfer embroidery patterns onto your fabric? Here are four simple ways for you to choose from.
![]()
![]()
![]()
Transfer Method #1: Light
What You Will Need:
• Light box or sunny window
• Pattern
• Lightweight fabric – suggestions: cotton, linen, muslin
• Iron & ironing board
• Tape
• Fine-tip marker – suggestions:
- Water-soluble pen
- Mechanical pencil
- Heat disappearing pen
- Pigma Micron pen:
- – Recommended colors: brown or sepia
- – Recommended sizes: .20mm or .25mm
- Mechanical pencil
How To Transfer Embroidery Patterns Using Light:
1. Pre-shrink and iron fabric.
2. Cut a piece of fabric on the straight of grain to fit your pattern and hoop size.
3. Tape your pattern to a light box or bright window.
4. Tape your fabric over the pattern, making sure that the pattern design is square with the grain of the fabric.
5. Trace over the design using your fine-tip marking pen or pencil. Be sure to trace with long continuous lines and not with short sketch strokes.
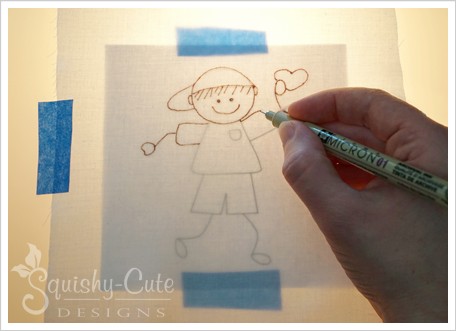
6. After tracing: If you used a Pigma Micron pen, heat-set the ink with a hot, dry iron (no steam), so the ink won’t smudge. Be sure to use a pressing cloth so that the ink does not transfer onto your iron. Note: Ironing the ink does not guarantee that it will now be colorfast, so you might want to test it if you plan on washing your finished embroidery.
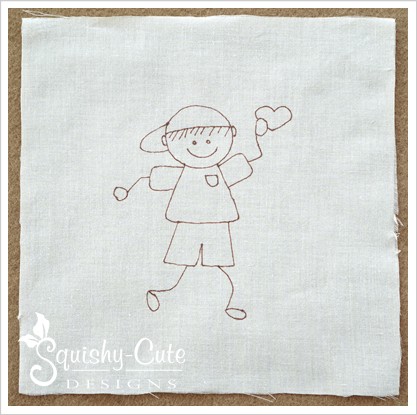
Shown on 100% cotton lawn fabric
![]()
![]()
Transfer Method #2: Heat
What You Will Need:
• Iron-on transfer pen / pencil
• Pattern (reversed)
• Iron
• Firm surface for ironing (firmer than a padded ironing board)
• Fabric (100% natural fibers with smooth surface) suggestions: cotton, linen, silk, muslin.
How To Transfer Embroidery Patterns Using Heat:
1. Pre-shrink and iron fabric.
2. Trace over reversed pattern with your iron-on transfer pen or pencil. When tracing with the pen, be sure to press lightly. Otherwise, you will get a thick line that might not get completely covered with the embroidery floss.
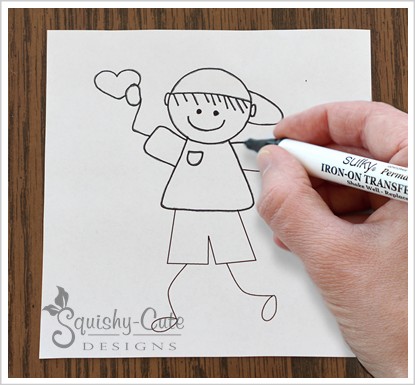
3. Place fabric on a firm surface, firmer than a padded ironing board. With fabric right-side up, place the pattern ink-side down on top of the fabric. Line up the pattern with the straight of grain of the fabric. Note: Remember when placing your pattern to be sure that you have enough fabric around it for your hoop size.
4. Using a hot, dry iron (no steam), press the iron in a down and up motion over the pattern paper. Don’t sweep the iron back and forth because that might make the paper move.
5. Carefully check the progress of the transfer by lifting a corner of the paper. It’s very important that the paper does not move. To help hold the pattern in place, leave the iron down on the paper while you are peeking.
6. That’s it! The design is now ready.
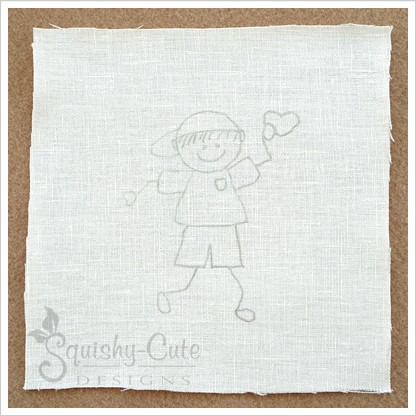
Shown on 100% linen fabric
![]()
![]()
Transfer Method #3: Tracing Paper
What You Will Need:
• Dressmaker’s tracing paper or Super Chacopaper (NOT office carbon paper)
• Tracing stylus / ballpoint pen / slightly dull pencil
• Pattern
• Tape
• Fabric – suggestions: cotton, linen, silk, muslin
How To Transfer Using Tracing Paper:
1. Pre-shrink and iron your fabric.
2. On the right-side of the fabric, tape the tracing paper to the fabric, colored side down. Then tape your pattern on top of that. Be sure to line up the pattern with the straight of grain of the fabric. Secure everything with tape so that nothing moves or slips while you are tracing. Note: Remember, when placing your pattern, be sure that you have enough fabric around it for your hoop size.
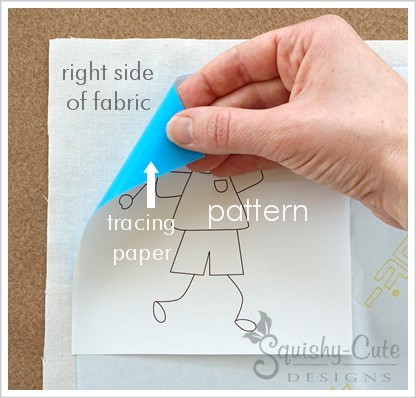
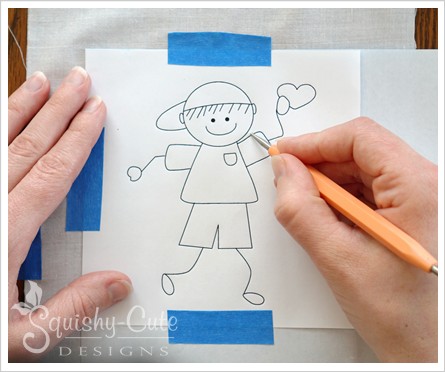
3. Trace over the design using a tracing stylus, ballpoint pen, or slightly dull pencil.
4. That’s it! You are now ready to start stitching.
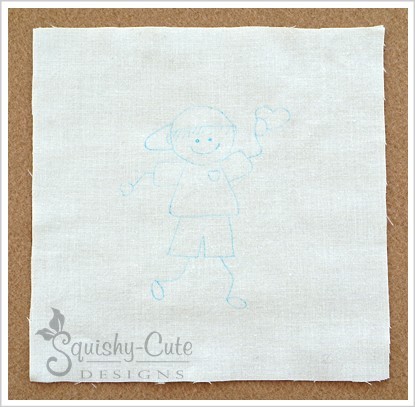
Shown on 100% cotton broadcloth fabric
![]()
![]()
Transfer Method #4: Printers
What You Will Need:
• Inkjet or laser printer
• Digital pattern
• Freezer paper: 9″ x 11.5″ (NOT wax paper)
• Scissors / rotary cutter
• Pencil
• Iron & ironing board
• Pressing cloth
• Cardstock: 8.5″ x 11″ (for cutting template)
• Fabric: 9.5″ x 12″
Important: A key consideration is the thickness of the fabric. Lightweight, 100% natural fabrics with a tight weave and a smooth surface perform best.
Recommended fabrics: cotton, linen, muslin, silk.
Optional:
• Pre-made inkjet fabric sheets – Another option for using your inkjet printer would be to buy pre-made inkjet fabric sheets. Then just follow the manufacturer’s instructions. If you use these pre-made sheets, then you can eliminate all of the above supplies except of course, the printer and your pattern.
• Bubble Jet Set 2000 and Bubble Jet Rinse – Some inkjet ink is colorfast and will not run or bleed, but some are not. Test your printer’s ink if you plan on washing your finished embroidery. If you are planning on washing your finished embroidery and want to be sure that the ink will be colorfast, then you may want to use these additional fixative products.
How To Transfer Using Printers:
Disclaimer: We are only providing information on what works for us. We cannot guarantee it will work for you. If you are uncomfortable about sending fabric through your printer, we would recommend that you do more research on this transfer method before you proceed. If you do decide to try this method, it is your decision, and you take responsibility for the results to your printer.
1. Pre-shrink and iron your fabric.
2. Cut a piece of fabric 9.5″ x 12″ on the straight of grain.
3. Important: Remove any lint or loose threads from your fabric. If needed, iron the fabric piece again to make sure it is perfectly wrinkle-free.
4. With right-side of fabric facing down, place a piece of freezer paper (9″ x 11.5″) shiny-side down on top of the wrong-side of the fabric. Be sure the freezer paper is evenly centered over the fabric.
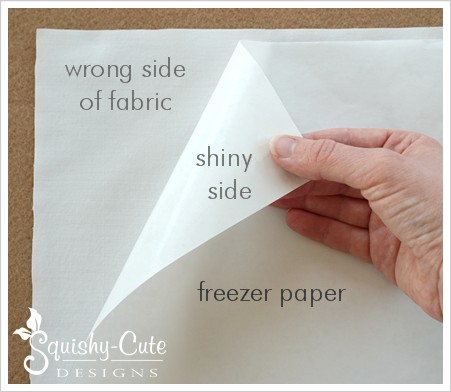
5. Iron directly on top of the freezer paper with a hot, dry iron (no steam) to temporarily bond it to the fabric. Sweep the iron from the center out to help work out any air bubbles. Iron until freezer paper is completely adhered to the fabric, maybe for about a minute.
6. Place your 8.5″ x 11″ cardstock on top of the bonded freezer paper / fabric and trace around it.
7. Cut along the traced lines. It’s important to cut the edges as smooth and straight as possible with no jagged edges. Jagged edges might get caught up inside the printer. Scissors can be used, but it might be preferable to use a rotary cutter and straight edge to get a nice clean edge.
Important: After cutting, press over the edges again to be sure there is a tight bond between the fabric and the freezer paper. This time, just press straight down and up. Don’t sweep the iron back and forth because it might move the paper. And again, remove any loose threads.
8. Set your printer to the thickest paper setting (cardstock) and use the highest quality setting on your printer.
9. Using the printer’s manual feed, send the fabric through the printer.
10. Allow the ink to dry completely.
11. Heat-set the ink with a hot, dry iron (no steam) so that the ink won’t smudge. Place ink-side down on a piece of paper or pressing cloth and press straight down and up. Note: Ironing the ink does not guarantee that it will now be colorfast.
12. Peel off the freezer paper and you’re ready to begin stitching.

Shown on high quality bleached muslin fabric
![]()
![]()
We hope this tutorial has been helpful in teaching you how to transfer embroidery patterns onto your fabric. Also, if you have ever considered embroidering on felt instead of fabric, we have another tutorial on how to transfer your embroidery designs onto felt. Getting your designs onto felt can be a little more tricky than fabric because it’s opaque and fuzzy. So if you need some help with your felt projects, be sure to check out our Transfer Methods for Felt tutorial as well!
![]()
![]()
You may also like….
![]()
![]()

