
How To Do The Stem Stitch
![]()
![]()
![]()
![]()
![]()
![]()

![]()
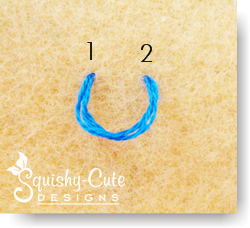

Work the stem stitch from left to right and always keep your working floss below the needle. To start the stem stitch, bring your needle up from the back at #1 in the photo, and then back down at #2. Pull your thread down through the fabric until you are left with a small loop of thread showing (don’t pull your thread all the way through yet).
![]()
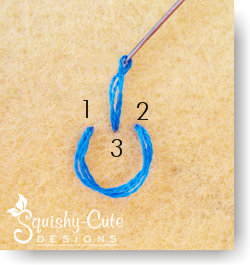

While keeping your thread below your needle, bring your needle back up at #3 (between #1 and #2) and pull your thread all the way through.
![]()
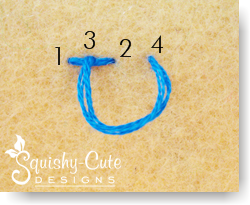

Send your needle down a stitch length away at #4, but again leave a small loop of thread below your needle.
![]()
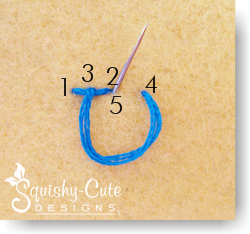

Now bring your needle up at #5, through the same hole as the end of your previous stitch at #2 and pull your thread all the way through.
![]()
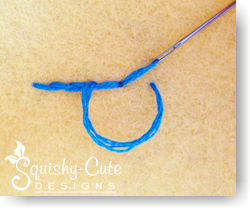

Continue working your way from left to right, always keeping your thread below your needle and always coming up in the same hole as the previous stitch. To end the stem stitch, simply send your needle down at the end of your last stitch.
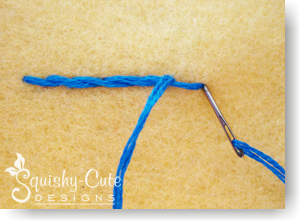
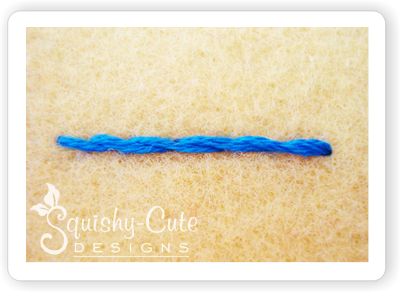
The stem stitch is one of the most common line stitches and is easy to work along a straight or curved line. When working on a curve, always keep the thread to the outside of the curve. And when working along a tight curve be sure to take smaller stitches.
Return to Helpful Hints from Stem Stitch
Return to Home Page
