Patriotic Sewing Project: Picnic Containers
![]()
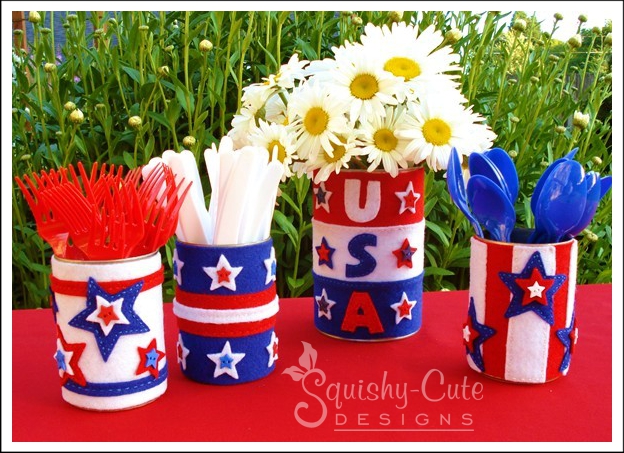
Here is a fun patriotic sewing project that reuses tin cans. This project will show you how to turn recycled tin cans into patriotic containers for your 4th of July BBQ or picnic. They can be used for your picnic silverware, straws, or as a vase for flowers. We created four different can covers so you would have some design ideas. We have also provided several sizes of stars so that you can create your own look too! And best of all, this is an inexpensive way to make attractive picnic containers that you can save and use year after year.
Happy summer sewing,

![]()

![]()
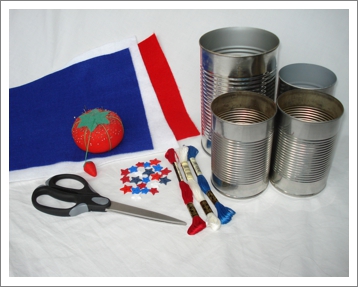
- Tin cans
- Felt: red, white and blue
- Embroidery thread: red, white and blue
- Star buttons: red, white and blue
- Needle
- Scissors
- Template

Red Can
These instructions are for a 15-16 oz can measuring about 4.4″ tall and 2.9″ in diameter. If your can is not this size, you can still follow these instructions but you will have to use your own measurements. click here for the tin can crafts template.
![]()
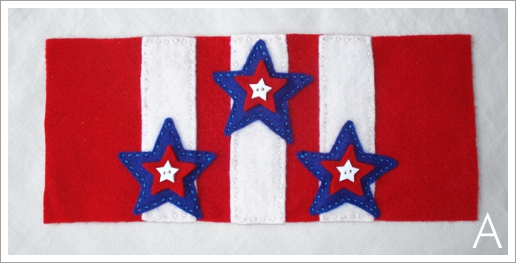

Measure your can’s height and circumference. Then cut out a piece of red felt that will fit your can’s size. For our can the felt measured 4.125″ tall by 10.5″ wide.

Cut three white stripes measuring 1.25″ by 4.125″. Stitch these stripes on using the running stitch around the border. One stripe should be in the center of your felt, and then sew the other two stripes down on either side, leaving a 3/4″ space on both sides of the center piece.

Using star size number 7 cut out three blue stars. Place the stars to your liking or according to photo A. Stitch these stars on using the same running stitch.

Using star size number 4 cut out three red stars. These will not be stitched on (unless you want to). Place the red stars on the blue stars and sew on a small white star button to anchor each red star in place.

Now the felt is ready to be sewn onto your can. Wrap the felt around your can and sew the two ends together using a whip stitch. See photo E at the bottom of this page. Now your red can is complete!
![]()
White Can
These instructions are for a 15-16 oz can measuring about 4.4″ tall and 2.9″ in diameter. If your can is not this size, you can still follow these instructions but you will have to use your own measurements. click here for the tin can crafts template.
![]()
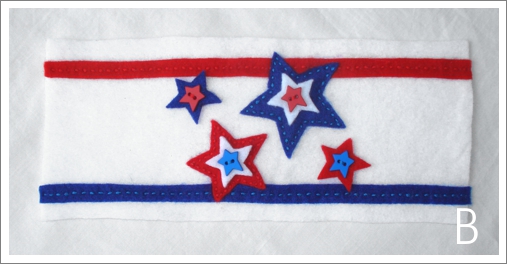

Measure your can’s height and circumference. Then cut out a piece of white felt that will fit your can’s size. For our can the felt measured 4.125″ tall by 10.5″ wide.

Cut one red and one blue stripe measuring 1/3″ by 10.5″. Stitch one stripe on about 1/3″ down from the top of the can, and the other stripe about 1/3″ up from the bottom using the running stitch down the center.

Using star size number 8, cut out one blue star. Stitch the star on using the running stitch around the border. Then, using star size number 7, cut out one red star. Stitch this star on near the blue star, also using the running stitch.

Using the star size number 4, cut out two white stars, one red star, and one blue star. Place one white star on the large red star and the other on the large blue star. Then place the small red and blue star to your liking or according to photo B. Then sew on a star button in the center of each felt star to anchor each one in place.

Now the felt is ready to be sewn onto your can. Wrap the felt around your can and sew the two ends together using a whip stitch. See photo E at the bottom of this page. Now your white can is complete!
![]()
![]()
Blue Can
These instructions are for a 15-16 oz can measuring about 4.4″ tall and 2.9″ in diameter. If your can is not this size, you can still follow these instructions but you will have to use your own measurements. click here for the tin can crafts template.
![]()

Measure your can’s height and circumference. Then cut out a piece of blue felt that will fit your can’s size. For our can the felt measured 4.125″ tall by 10.5″ wide.

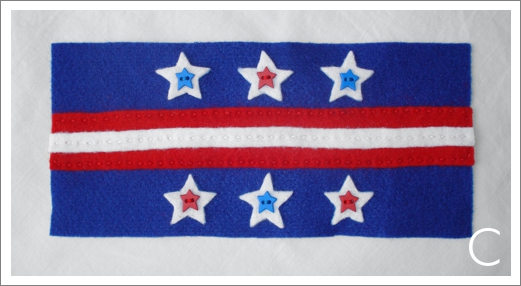
Cut one red stripe measuring 1.25″ by 10.5″. Stitch this stripe on across the center of the blue felt using the running stitch along the border. Cut one white stripe measuring 1/3″ by 10.5″. Stitch this stripe onto the center of the red stripe using the running stitch down the center. See Photo C.

Using the star size number 4 cut out six white stars. Place two in the center of your felt (top and bottom of the stripes). Space the others out from the center ones. See Photo C. Now anchor each felt star in place by sewing on a small red or blue star button on top.

Now the felt is ready to be sewn onto your can. Wrap the felt around your can and sew the two ends together using a whip stitch. See photo E at the bottom of this page. Now your blue can is complete!
![]()
USA Can
![]()
These instructions are for a 40 oz can measuring about 6.25″ tall and 4″ in diameter. If your can is not this size, you can still follow these instructions but you will have to use your own measurements. click here for the tin can crafts template.

Measure your can’s height and divide that by three. Then measure the circumference of the can. Cut out one red stripe, one white stripe, and one blue. The red stripe and white stripe should have a length equal to the can’s circumference plus about 1/4″ or more, and a width equal to 1/3 the can’s height plus about 1/4″ as well for seam allowance. The blue stripe however, should have a length equal to the can’s circumference plus about 1/4″ or more, but the width can be equal to 1/3 the can’s height with no extra seam allowance. For our can, the red and white stripe measured 13″ by 2.25″ and the blue stripe measured 13″ by 2″.

Start by stitching the blue stripe onto the white stripe using the running stitch, with about 1/4″ seam allowance. Then stitch the white stripe onto the red stripe, again with 1/4″ seam allowance.

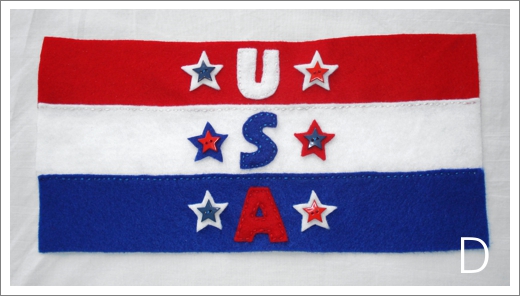
Cut out the “USA” letters provided on the tin can crafts template. We used the larger set of letters for our can. Cut out a white “U” and a blue “S” and a red “A”. Stitch the letters on down the center of your felt using the running stitch. See photo D.

Using the star size number 4, cut out four white stars, one red star and one blue star. Place two white stars on each side of the “U” and the “A”, and a red and blue star on each side of the “S”. Anchor each felt star in place by sewing on a small star button in the center.

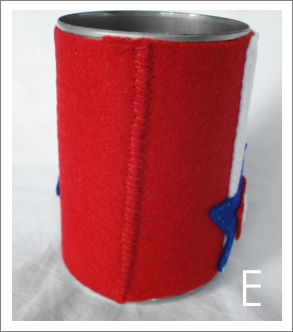
Now the felt is ready to be sewn onto your can. Wrap the felt around your can and sew the two ends together using a whip stitch. See photo E below. Now your USA can is complete!
![]()
![]()
![]()
You may also like….
![]()
We hope you enjoyed this sewing project for felt can covers. Now you have some really patriotic picnic containers for your 4th of July BBQ! They would also be great for a Memorial Day picnic as well. If you would like some more summer sewing or embroidery projects, be sure to check out our other project ideas shown above.
Happy sewing everyone!
![]()
![]()
Return to Free Printable Sewing Patterns
Return to Home Page

